Yoga for Sciatic Neuritis Relief: Poses and Practices
IDY2024: Yoga for Sciatic Neuritis Relief By Sanya Goutham | Alva’s College of Naturopathy and Yogic Sciences | Nature’s Tranquility
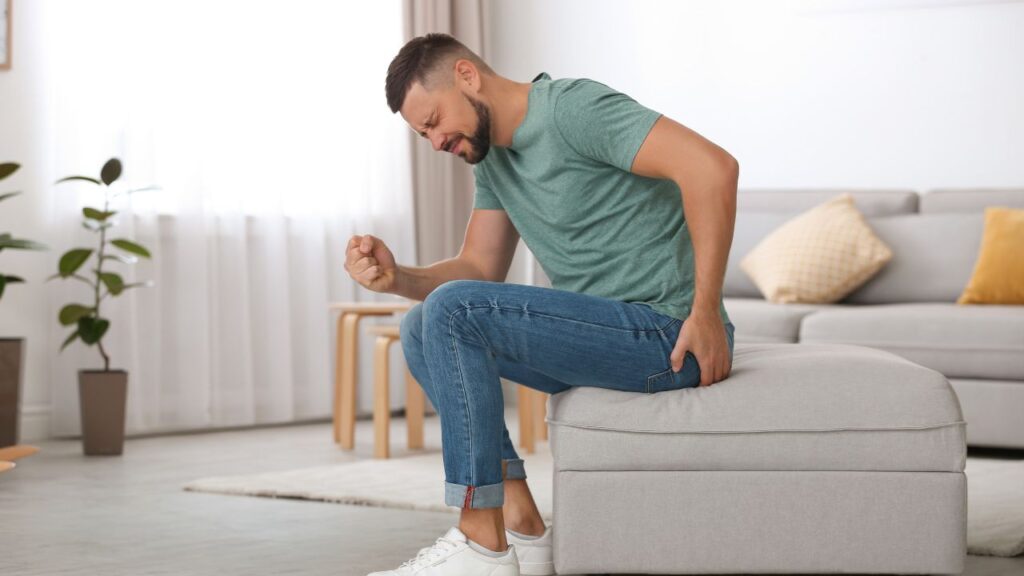
The sciatic nerve is the largest nerve in the human body and is formed by the union of 5 nerve roots from the lower spine. It passes deep in the buttock and down the back of the thigh all the way to the heel and sole of the foot. The sciatic nerve serves a vital role in connecting the spinal cord with the skin and muscles of the thigh, leg, and foot. Sciatic neuritis can impact your quality of life, but with the right approach, you can manage the symptoms and improve your mobility
Sciatic Neuritis also known as sciatica is nerve pain from an injury or irritation to your sciatic nerve. In addition to pain, it can involve tingling or numbness in your back or butt that may also radiate down your leg. More severe symptoms are also possible. Moreover Sciatic neuritis can be caused by various factors, including herniated discs and muscle tightness.
YOGA POSES FOR SCIATICA RELIEF
Child’s Pose (Balasana)
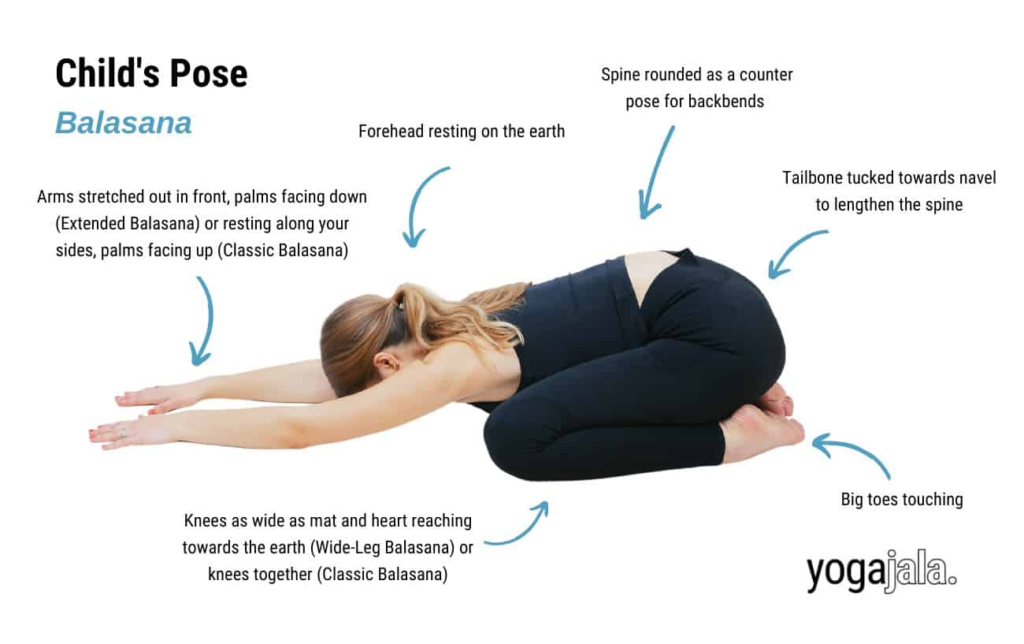
Child’s Pose is an effective stretching asana to stretch and relax your back, hips, thighs, and ankles. In addition to its physical benefits, the asana helps you reconnect with your inner self. It lengthens and stretches your spine, promoting flexibility and openness in your hips, thighs, and lower back.
- Start on your hands and knees. Bring your knees together and sink your hips back onto your heels.
- Extend your arms in front of you or allow them to rest alongside your body.
- Allow your torso to relax completely as you fall heavily into your thighs.
- Focus on deepening your breath to relax any areas of tightness or sensation.
- Hold this pose for up to 5 minutes.
Downward-Facing Dog (Adho Mukha Svanasana)
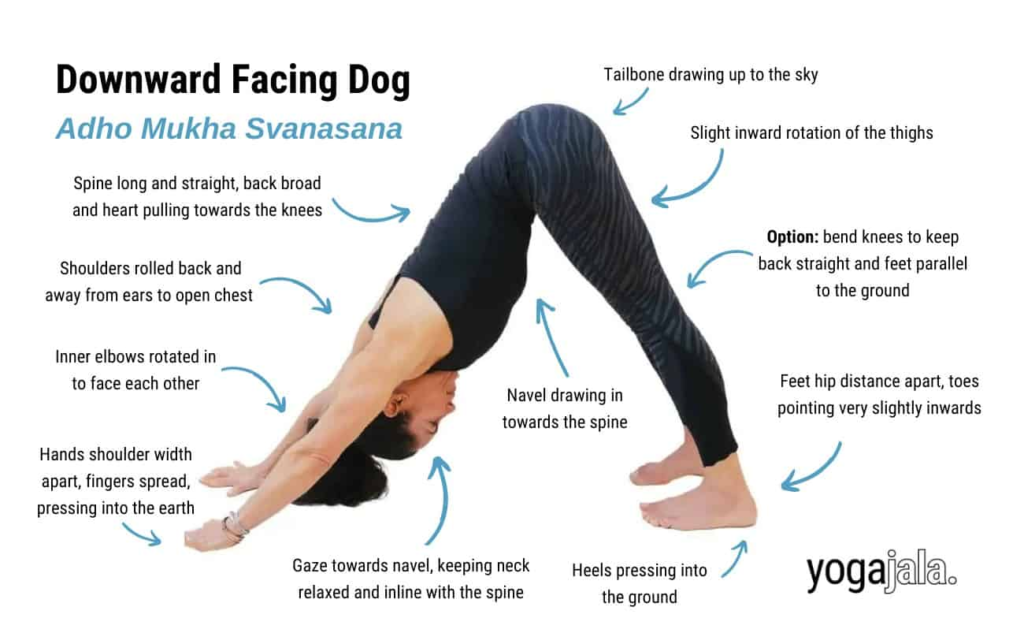
Adho Mukha Svanasana is derived from Sanskrit. This forward bend helps bring your body into alignment, relieving pain and tightness Moreover Downward-Facing Dog promotes strength in your entire body while helping to correct imbalances.
- Start on your hands and knees. Press into your hands as you lift your hips toward the ceiling.
- Drop your head down to bring your ears in line with your upper arms or your chin all the way in toward your chest.
- Bend your knees to tilt your pelvis slightly forward.
- Intuitively move your body through any variations that feel appropriate. Hold this pose for up to 1 minute.
Half Moon Pose (Ardha Chandrasana)
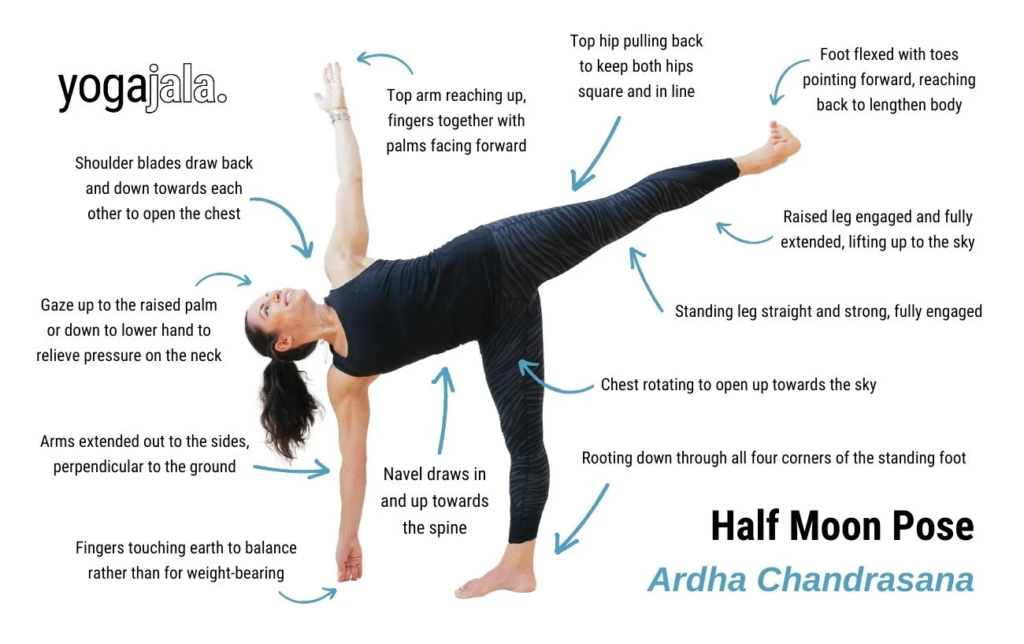
Half Moon Pose strengthens, stabilizes, and balances your body. It increases flexibility, relieves tension, and stretches your spine, glutes, and thighs.
- Start in a standing pose, such as Triangle, with your right foot in front.
- Bend your right knee a bit deeper and yield your weight into your right foot.
- Bring your left hand to your hip.
- Slide your left foot forward a few inches as you reach your right hand to the floor in front of and to the right of your right foot.
- Lift your left leg so it’s parallel to the floor, pressing out through your left heel.
- Rotate your torso and hip open as you gaze forward.
- To go deeper, lift your left hand up toward the ceiling and turn your gaze upward. Hold this pose for up to 1 minute.
- Slowly release by bending your right leg and lowering your left leg to the floor, returning to the starting position.
- Repeat on the opposite side.
Cobra Pose (Bhujangasana)
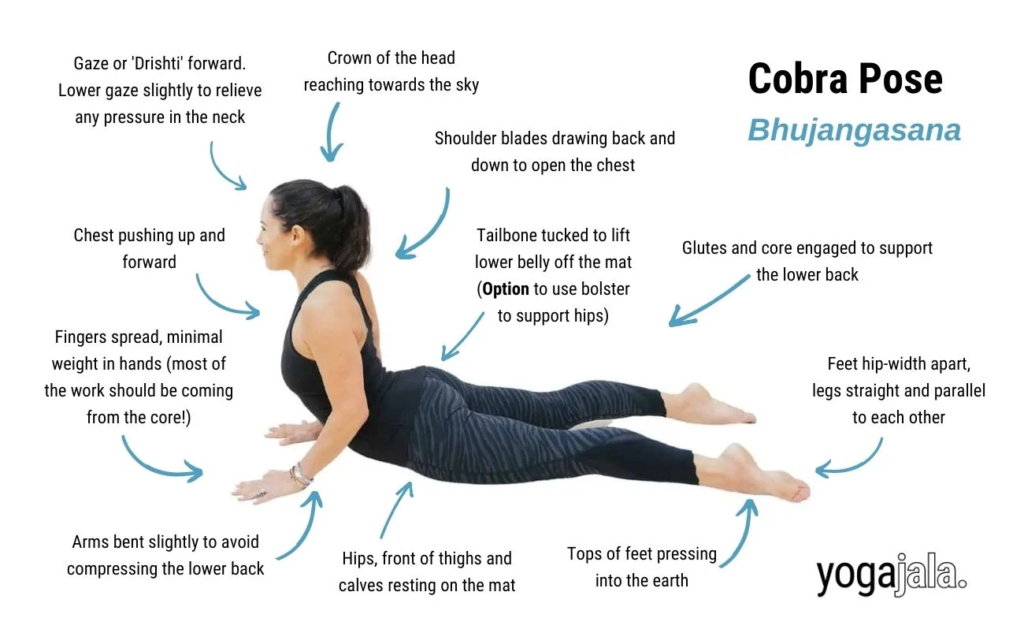
This pose is a backbend that stretches the spine, chest, and abdomen while strengthening the muscles of the back and arms. This soothing pose strengthens and stretches your spine, promoting circulation and flexibility.
- Lie on your stomach with your hands under your shoulders.
- Squeeze your elbows into your body.
- Inhale to lift your head, chest, and shoulders.
- Maintain a slight bend in your elbows and keep your chest open.
- Engage your thighs, lower back, and abdominals.
- Hold for up to 30 seconds.
- Release the pose, rest, and repeat 1–3 times.
Locust Pose (Salabhasana)
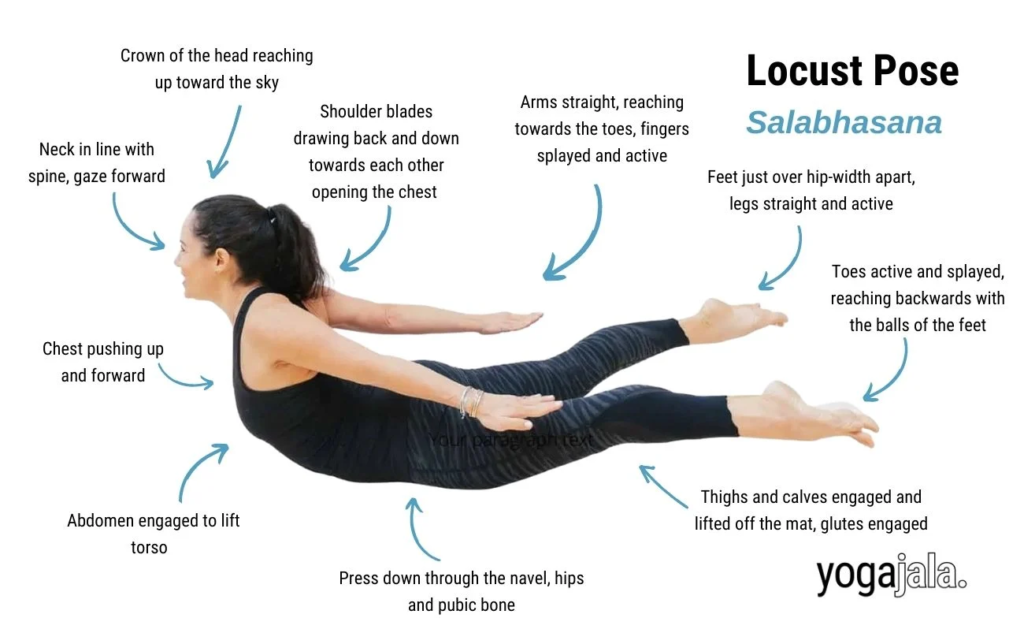
There is a variation of this posture called the “viparita shalabha” asana. This pose strengthens your spine, glutes, and thighs. It stabilises your core and lower back. It also promotes circulation and flexibility in your hips.
- Lie on your stomach with your fingers interlaced at the base of your spine.
- Slowly lift your chest, head, and arms up as high as you can.
- Bring your arms up and away from your body.
- To go deeper, raise both of your legs or 1 leg at a time.
- Engage your glutes, lower back, and abdominals.
- Hold for up to 30 seconds.
- Release the pose and return to the starting position.
- Rest and relax your body for a few breaths while gently moving your hips from side to side.
- Repeat 1–2 times
Knees-to-Chest Pose/Wind-Relieving Pose (Pawanmuktasana)
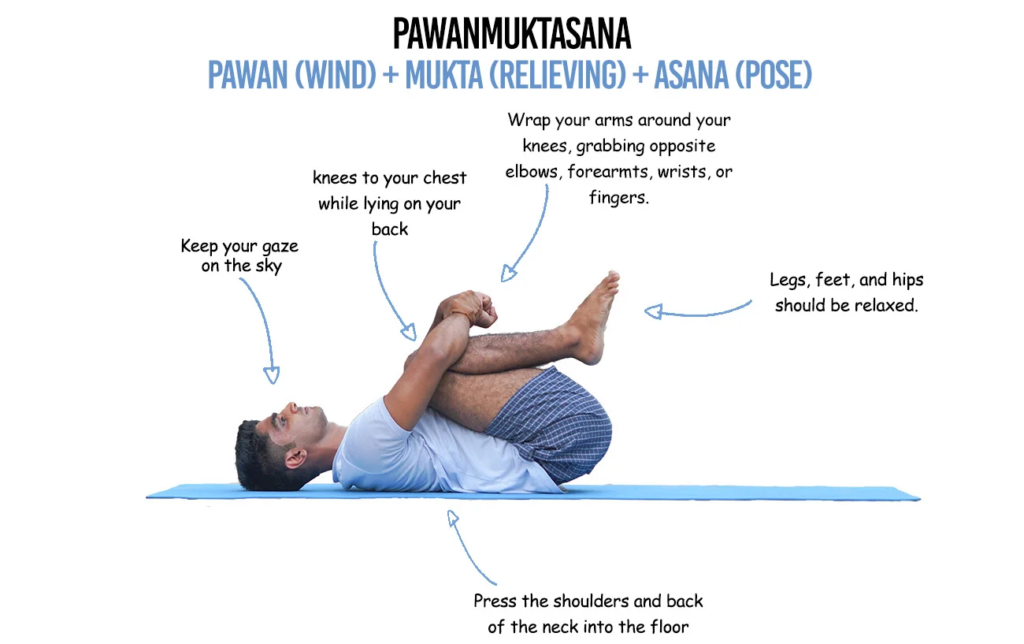
This is an excellent pose to relieve tightness in your lower back, hips, and glutes.
- Lie on your back and draw both knees in toward your chest.
- Draw your ankles and knees together as you reach your hands around the backs of your thighs or around your shins.
- If your hands reach, interlace your fingers or take hold of opposite elbows.
- To deepen the stretch, lift your head and tuck your chin into your chest.
- Hold this pose for up to 1 minute
Reclined Pigeon Pose (Supta Kapotasana)
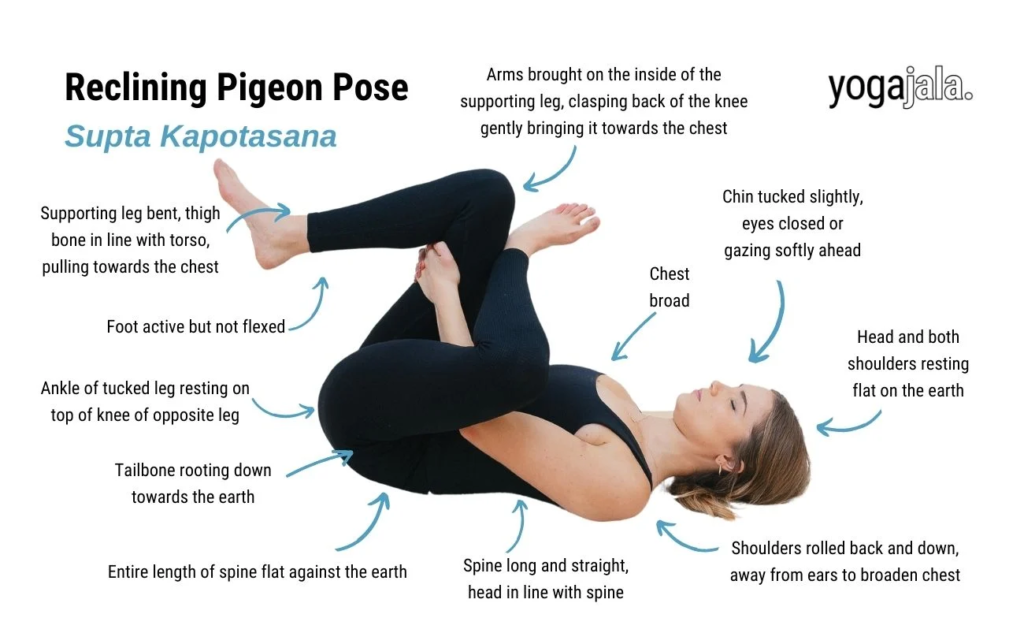
The Reclined pigeon pose is a relatively gentle supine hip opener and lower body stretch closely related to the pigeon pose. Doing Pigeon Pose on your back helps support your lower back and puts less pressure on your hips. Reclined Pigeon Pose stretches your glutes and hips as well as the piriformis muscle.
- Lie on your back with your knees bent and your heels in toward your hips.
- Bend your right knee and bring your right ankle to the bottom of your left thigh.
- Stay here if you already feel a deep stretch.
- To go deeper, lift your left foot and draw your left knee in toward your chest.
- Interlace your fingers to hold behind your left thigh or shin.
- Hold for up to 1 minute.
- Repeat on the opposite side.
Bridge Pose (Setu Bandha Sarvangasana)
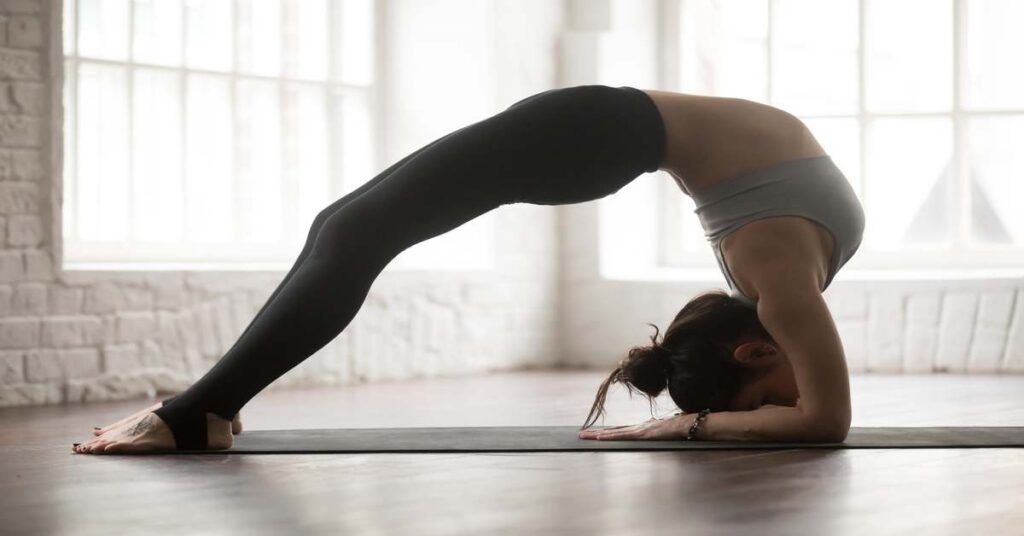
Bridge Pose stretches the spine, relieving pain and tension. Its gently stimulating effect on the body boosts circulation. Plus, it works on your legs, glutes, and core.
- Lie on your back with your knees bent and your heels in toward your hips.
- Bring your arms alongside your body with your palms facing down.
- Slowly lift your spine from the floor, raising your hips as high as possible.
- Place a block between your knees or thighs to maintain alignment.
- Slowly lower back down.
- Repeat this movement 10 times.
- Relax your body in the starting position.
- Hold the pose in the top position for up to 1 minute
Half Lord of the Fishes Pose (Ardha Matsyendrasana)
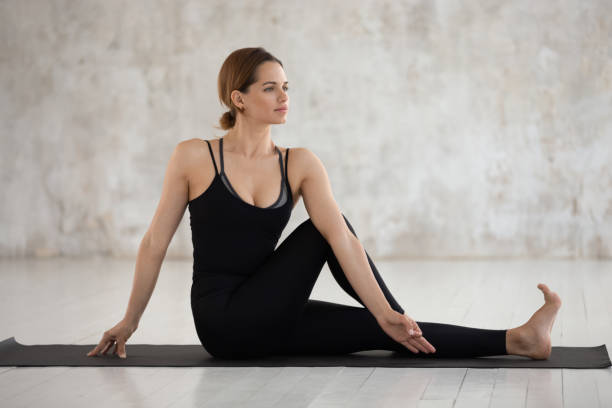
Ardha Matsyendrasana or the Spinal Twist increases the elasticity of the spine due to the twist. This twist stretches and lengthens your spine, relieving pain and tension. Research suggests that incorporating lifestyle changes like regular exercise and proper posture can help prevent sciatic nerve pain.
- Start in a seated position. Bring your right foot to the outside of your left hip with your knee pointed forward or to the side.
- Move your left foot to the outside of your right thigh.
- Bring your left hand to the floor behind you, staying supported on your fingertips.
- Wrap your right arm around your left thigh or bring it to the outside of your left thigh.
- With each inhale, lift and lengthen your spine.
- With each exhale, twist a bit more to move more deeply into the pose.
- Turn your head to gaze in any direction.
- Hold for up to 1 minute.
- Repeat on the opposite side
Legs-Up-the-Wall pose (Viparita Karani)
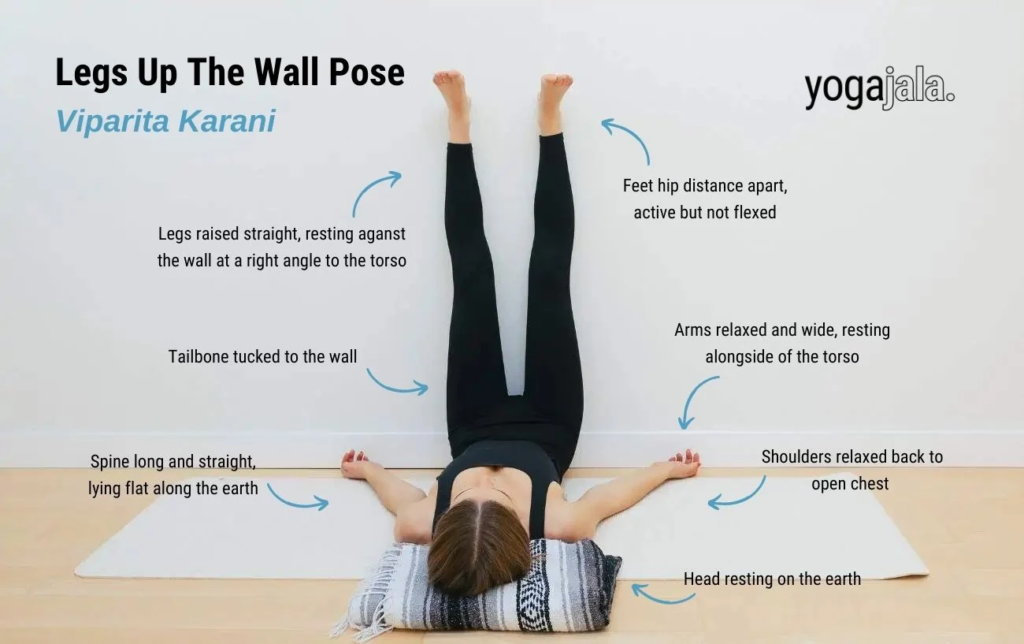
Legs up the wall pose is both an asana and a mudra in hatha yoga. This is the ultimate restorative pose, allowing your body to rest, relax, and recover.
- Sit with your right side against the wall.
- Lie back and swing your legs up along the wall, bringing your hips as close to the wall as is comfortable.
- Place a pillow or folded blanket under your head.
- Bring your arms into any comfortable position.
- Allow your body to fall heavy as you completely relax.
- Remain in this pose for up to 2 minutes.
By Sanya Goutham | Alva’s College of Naturopathy and Yogic Sciences | Nature’s Tranquility